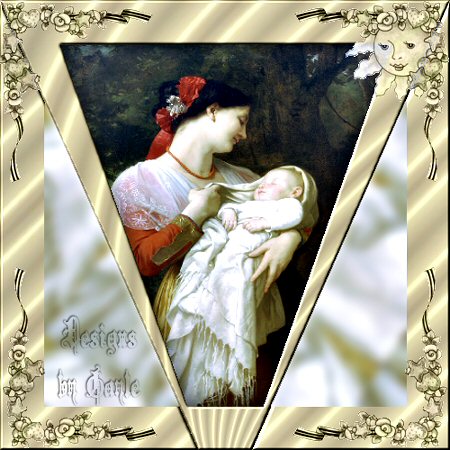
 Although simple, this is for the intermediate/advanced PSP user as I have no screen shots. But I also found out that trying is the best way to learn. *S* This tutorial was written by me and is ©momentzdesignz Any other tutorial that looks similar is purely coincidental and no infringement of any other artist is intended. For this tutorial you will need the following: PSP V8 Image of choice Gold pattern - download NOTE: For this frame you will want a centered image and 1 that is large enough to fit into the frame selection as above in my finished sample.
1 - Open your image, duplicate 3 times and close the original
2 - Minimize the images for now 3 - Set your Background to the Gold pattern 4 - Open a new transparent image 500 x 500 px 5 - View > Ruler and make a rectangle with the following co-ordinates: 50 to 450 across and 450 to 450 down and across NOTE: This will give you a selection square inside the transparent image. 6 - Selections > Invert 7 - Flood fill your border with the gold pattern 8 - Keep Selected 9 - Effects > Geometric Effects > Perspective Vertical Settings: Distortion 88 and check Transparent 10 - Selections > Select none 11 - Using your magic wand, select the gold border 12 - Effects > 3D Effects > Inner Bevel > Metallic Preset 13 - Selections > Select none 14 - With your magic wand, select the large triangle for your main image 15 - Selections > Modify > Expand > 1 16 - Get your image and chose the center you wish to insert in the selection 17 - Edit > Copy > Paste into Selection NOTE: If necessary, play with the image and get just the right part to display in this part of the frame by making different selections. 18 - Selections > Select none Filling the other 2 sections 19 - These we are going to fill as we did the 1st 1 only using different parts of the image or the same with different texture effects. We don't want these two parts to take from the main image but correspond with it. NOTE: I simply made a new tile from the image and put it into my materials palette and moved it around. If you do most steps on a new layer, you can always move them around as you wish. 20 - Make a selection on each image and use as you think looks nice 21 - Select the triangle and do as we did in steps 14, 15, 16 and 17 22 - Selections > Select none Since this is a plain frame, decorative corners can be used to enhance it. 23 - Layers > Merge > Merge all flatten 24 - Re-size, add your watermark and save as a .jpg If you have any questions, please feel free to email me. ©momentzdesignz 1999 Below is her beautiful result.  Back to Tutorials |